When a dusk-to-dawn sensor fails, the symptom is often simple: the light stays on at noon or remains dark after sunset. The cause may be less obvious. A dusty photocell, loose wire, failed LED driver, or nearby porch light can confuse the sensor. The U.S. Department of Energy reports that lighting controls can reduce lighting energy use, although actual savings depend on installation and operating conditions. A faulty sensor therefore wastes more than convenience.
This guide explains How to troubleshoot a faulty dusk to dawn sensor with practical, safety-focused checks. Start outside. Look for spider webs, water droplets, paint, or leaves covering the small sensor window. Then observe nearby security lights, reflective walls, and bright windows. These details can create false daylight. The U.S. DOE’s Solid-State Lighting Technology Fact Sheet also notes that LED systems depend on compatible controls and drivers. A sensor may work correctly while another component fails.
Turn off power before opening any fixture. Check the circuit breaker, wire connections, and manufacturer’s wiring diagram. If you use a multimeter, verify voltage only when you understand the procedure. Otherwise, contact a qualified electrician. Industry guidance from the National Electrical Manufacturers Association emphasizes following listed equipment instructions and using suitable components. Not every failure is a sensor failure. That assumption can waste time. Even experienced installers can overlook a small shadow or a loose neutral connection. A careful diagnosis begins with evidence, not guesswork.
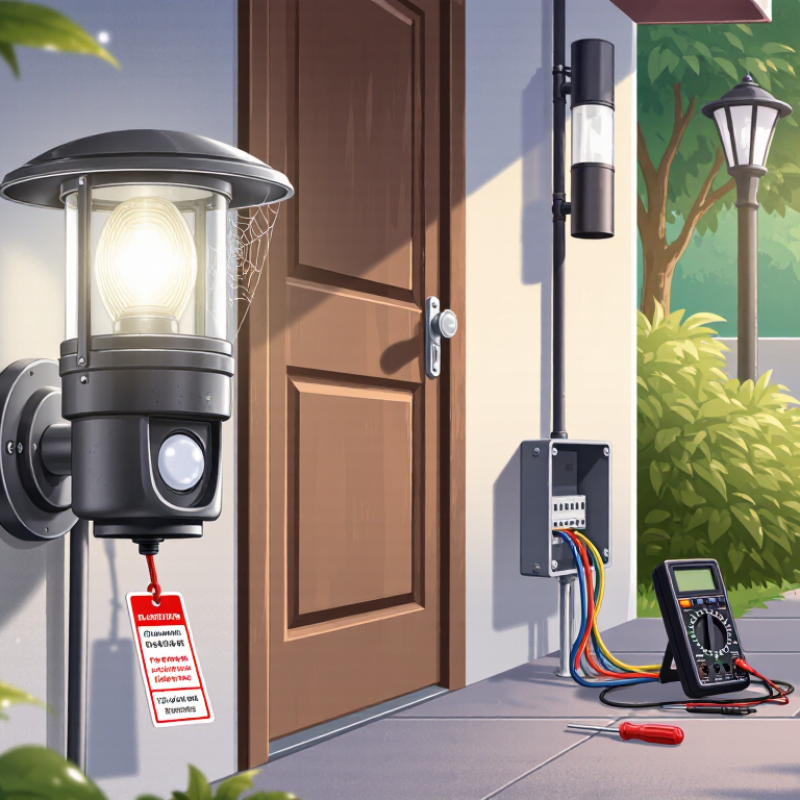
A dusk-to-dawn sensor uses a photocell to measure surrounding light. During daylight, the sensor keeps the light switched off. When the sky becomes dark, it signals the circuit to turn the light on. Most sensors include a short delay, so passing shadows should not trigger constant switching. In practical testing, this delay can last several seconds or longer.
Dirt, paint, or spider webs may cover the sensor window. Clean it gently with a dry, soft cloth. The sensor may also face a porch lamp, window, or reflective wall. That nearby light can convince it that daytime has returned. I once blamed the wiring first, but the real problem was a bright security light shining directly at the photocell.
Check whether the sensor has a manual override or adjustable sensitivity setting. Turn the power off before examining loose connections, damaged insulation, or a corroded socket. If the light stays on, cover the sensor completely for several minutes, then uncover it and allow time for the circuit to respond. No change suggests a failed photocell, relay, or power connection. Cold weather, water entry, and an overloaded circuit can also cause unreliable operation. A replacement sensor must match the fixture’s voltage and electrical load. This detail is easy to overlook. If you are unsure about testing live circuits, ask a qualified electrician to inspect the installation safely.
A dusk-to-dawn sensor can fail because of a simple power problem. When the light stays off after sunset, check the breaker and wall switch. A tripped breaker, loose connection, or damaged cable may interrupt power. I usually begin with a non-contact voltage tester, then confirm readings with an approved meter. Do not touch exposed wires while power remains connected. If the circuit has no voltage, stop and have a qualified electrician inspect it.
Turn off the breaker before opening the fixture. Examine the line, neutral, and load wires for loose terminals, corrosion, or cracked insulation. The sensor’s line wire must connect to incoming power, while its load wire must connect to the light fixture. A loose neutral can cause flickering or complete failure. Some older installations have confusing wire colors. I once trusted color alone and had to recheck every connection. That mistake was avoidable.
Inspect the fixture itself. Replace a burned lamp and clean dust from the sensor lens. Nearby porch lights, reflective walls, or branches can keep the sensor from reading darkness correctly. Certain fixtures also draw more power than the sensor can safely control. Temporarily testing the fixture with a suitable direct connection can reveal whether the sensor or lamp is faulty. If the fixture still fails, the problem may involve its socket, internal driver, or supply voltage. Get professional help when readings remain uncertain.
A dusk-to-dawn sensor can fail because a thin film of dust blocks its light reading. Inspect the small sensor window during daylight. Look for cobwebs, pollen, dried rain marks, paint, or insect residue. Turn off power before cleaning. Use a soft, dry microfiber cloth first. If needed, slightly dampen the cloth with clean water. Never scrape the lens with a blade.
Check the sensor housing for cracks, clouding, loose seals, or water inside. A damaged cover can scatter light and cause daytime activation. The U.S. Department of Energy reports that quality LED outdoor lighting may reach about 50,000 operating hours, but the control sensor can still fail earlier. That difference matters. The sensor is often the weak link, not the lamp.
I once blamed a dead lamp, then found a spider web covering half the sensor. Small details matter. After cleaning, restore power and shade the sensor with your hand. The light should respond after a short delay. Remove your hand and expose it to daylight. It should switch off, although some units wait several minutes. ENERGY STAR data indicates LED lighting can use at least 75% less energy than incandescent lighting, so unnecessary daytime operation still wastes power. Do not ignore repeated flickering. A clean sensor that still behaves poorly may have internal moisture, wiring damage, or aging components. My first inspection is not always perfect, especially after storms. Recheck the mounting angle and nearby reflective surfaces.
Dusk-to-dawn sensors typically switch on as ambient light falls to low-light levels. If the sensor remains inactive at dusk, clean its lens and inspect it for dirt, paint, insects, moisture, cracks, or other obstructions that may affect light detection.
Start by checking the sensor during daylight. Switch the light off, then cover the photocell with dark tape. Wait three to five minutes, because many sensors include a delay. The lamp should turn on. Remove the tape and allow another delay before judging the result. Clean dust, insects, and water marks from the sensor window. Even a thin film can reduce light detection. Do not test under a nearby lamp, porch light, or reflective wall. False brightness is a common cause.
If the lamp remains off, inspect the timer, sensitivity, and dusk threshold settings. Turn the threshold slightly toward “darker,” then test again. Check that the sensor faces open sky, not the fixture itself. Turn power off before checking loose wires or damaged insulation. A qualified electrician should use a meter for voltage testing. Never guess around live wiring.
The U.S. Department of Energy reports that LED lighting uses at least 75% less energy than incandescent lighting and can last up to 25 times longer. That efficiency makes sensor adjustment worthwhile before replacing the fixture. The Illuminating Engineering Society also emphasizes proper photocontrol placement and commissioning in outdoor lighting practice. Still, field checks are not perfect. A cloudy afternoon can mislead the test. I sometimes retest after sunset, when the sensor’s behavior is easier to judge. If manual operation works but automatic control fails, the photocell or its settings may need replacement.
A dusk-to-dawn sensor often fails for simple reasons: dirt, incorrect wiring, moisture, or nearby lighting. Cover the sensor briefly during daylight and check whether the fixture responds. Check it at dusk. Do not guess. The U.S. Department of Energy reports that advanced lighting controls can reduce lighting energy use by up to 60% in suitable buildings. A faulty sensor can therefore waste energy every night, even when the lamp still works.
Replace the sensor when cleaning the lens, checking connections, and testing the lamp do not restore reliable operation. Replacement is also sensible when the light flickers, stays on during bright daylight, or reacts several minutes late. Choose a compatible replacement rated for the fixture’s voltage and outdoor exposure. The National Electrical Manufacturers Association advises using equipment suitable for its installation environment, especially where water and temperature changes are present. A weathered gasket matters.
Seek professional help when wires are damaged, the breaker trips, or the sensor connects to unfamiliar circuits. Turn off power before opening any enclosure. The Electrical Safety Foundation International reports that thousands of people suffer electrical injuries annually in the United States, showing why casual repairs can carry real risk. I have found that repeated sensor failures sometimes indicate loose connections or water intrusion, not a bad sensor. That possibility is easy to miss. A qualified electrician can test voltage, grounding, insulation, and load compatibility safely.
| Observed Symptom | Common Cause | Safe Checks to Perform | Recommended Action | Replace the Sensor or Call a Professional? |
|---|---|---|---|---|
| The light stays on during daylight |
|
|
Allow the sensor to receive clear natural daylight and observe it through one complete dusk-to-dawn cycle. | If cleaning and repositioning do not help, replace the sensor. Seek professional help if wiring must be inspected. |
| The light never turns on at night |
|
|
Restore power only if the breaker has tripped once and there are no signs of damage, burning, or moisture. Replace a failed lamp. | Call a qualified electrician if the breaker trips again, the fixture is hardwired, or power is absent at the sensor. |
| The light turns on and off repeatedly |
|
|
Redirect the sensor away from the fixture and other light sources, if the design permits adjustment. | Replace the sensor if cycling continues in stable lighting conditions. Use professional help for connection or compatibility problems. |
| The light responds several minutes late |
|
|
A consistent delay of several minutes may be normal. Keep the sensor unobstructed and monitor its behavior for more than one day. | Replace the sensor if the delay becomes excessive, unpredictable, or substantially different from its previous behavior. |
| The light flickers, buzzes, or glows faintly when off |
|
|
Use a lamp and sensor combination rated for the same electrical application. | Do not continue using the fixture if there is smoke, a burning smell, heat damage, or arcing. Arrange professional inspection. |
| The sensor works intermittently after rain or in humid weather |
|
|
Keep the circuit switched off until the source of moisture is corrected and the affected parts are dry and safe. | Seek professional help. A weather-damaged sensor or enclosure commonly requires replacement and a wiring inspection. |
| The sensor has visible cracks, corrosion, or burn marks |
|
|
Stop using the fixture until the damaged part is replaced. | Replace the sensor and have a qualified electrician check the wiring, enclosure, and grounding. |
| Basic cleaning, lamp replacement, and power checks do not solve the issue |
|
|
Replace the sensor when it is accessible, visibly worn, or consistently fails after safe external checks. | Seek professional help when the fault involves line-voltage wiring, inaccessible equipment, repeated breaker trips, or uncertainty about electrical safety. |
A photocell measures surrounding light. It keeps the fixture off during daylight and turns it on after darkness arrives. A short delay prevents passing shadows from causing repeated switching.
Dirt, paint, pollen, or cobwebs may block the sensor window. A porch lamp, bright window, or reflective wall can also shine into the photocell. Nearby light can imitate daytime.
Turn off power before cleaning. Wipe the window with a soft, dry microfiber cloth. If needed, use a slightly damp cloth with clean water. Never scrape the lens.
During daylight, cover the sensor completely for several minutes. The light may turn on after a delay. Uncover it and expose it to daylight. It should switch off later.
Check for cracks, clouding, loose seals, corrosion, or water inside the housing. A damaged cover can scatter light and trigger daytime operation. Inspect again after storms.
Moisture, cold weather, loose connections, overloaded circuits, or aging components can cause unreliable operation. A manual override or sensitivity setting may also be involved. Do not guess.
Replace it when cleaning, testing, and checking connections do not restore reliable operation. Replacement may help when the light flickers, stays on in bright daylight, or responds several minutes late. Choose a sensor matching the fixture’s voltage, load, and outdoor conditions.
Seek help if wires are damaged, insulation is cracked, a breaker trips, or the circuit is unfamiliar. Turn off power before opening any enclosure. Electrical testing is not a good place for casual experiments.
A dusk-to-dawn sensor automatically turns an outdoor light on when the surroundings become dark and off when daylight returns. If it stops working, the cause may be a power problem, loose wiring, a faulty fixture, dirt, physical damage, or incorrect settings. How to troubleshoot a faulty dusk to dawn sensor begins with switching off power and checking the circuit, connections, bulb, and fixture for visible issues. Make sure the sensor has a clear view of the sky and is not blocked by dust, leaves, paint, or nearby lights.
After cleaning and inspecting the sensor, restore power and test it by covering the sensor or adjusting the surrounding light conditions. Review its sensitivity, timer, and operating mode if these controls are available. If the light still behaves unpredictably, the sensor may need replacement. Any work involving damaged wiring, repeated electrical faults, or unsafe access should be handled by a qualified professional.

NexLt Light