Solar street lights work quietly through long nights, yet their performance often declines under dust, bird droppings, pollen, and industrial residue. This introduction to China Top 10 How to Clean Solar Panels on Street Lights? explains practical maintenance methods for municipal roads, parks, campuses, and remote pathways. The focus is simple: How to clean dirty solar panels on street lights without damaging the photovoltaic surface, wiring, battery system, or pole-mounted structure.
Bill Brooks, P.E., a respected solar operations and maintenance consultant, offers a useful principle: “Good maintenance begins with understanding what can fail.” That idea matters here. A panel covered with gray dust may look only slightly dirty, but its charging output can fall noticeably after weeks without rain. Technicians should inspect the panel during daylight, switch off equipment when required, and use clean water, a soft sponge, and a non-abrasive cloth. Harsh chemicals, metal tools, and high-pressure spraying can create expensive problems.
Small details count. A ladder may shift on loose soil. Wet glass may become surprisingly slippery. A dry brush can leave fine scratches. No cleaning plan is perfect. Rain sometimes helps, but it cannot remove oily film or hardened bird residue. This guide compares cleaning frequency, tools, safety checks, and professional service options. It also reflects on an uncomfortable truth: cleaning too often can waste water and labor, while cleaning too rarely can shorten system performance. The best method depends on local weather, panel angle, traffic pollution, and access conditions.
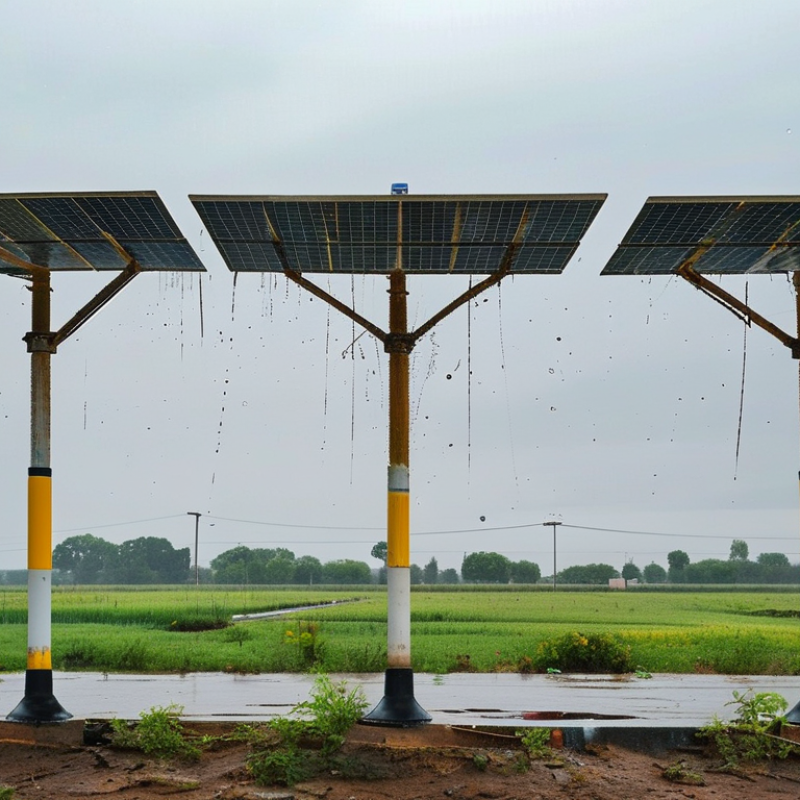
Dust, pollen, and bird droppings can reduce solar street light output. The IEA PVPS Task 13 report notes that soiling often causes 2% to 4% annual energy loss. Losses can rise in dry, dusty areas of northern and western China. Small panels need careful cleaning because their surface area is limited. Switch off the light before work. Clean early in the morning, when the panel is cool. Use clean water and a soft microfiber brush. Avoid metal tools and strong detergents. They may scratch the coating or leave mineral marks.
Tips: Check the panel every two months. Use low-mineral water where possible. A gentle rinse is usually enough. Do not use high-pressure spray near seals or wiring. Inspect cracks, loose frames, and blocked drainage during cleaning. The U.S. National Renewable Energy Laboratory identifies soiling as a regular photovoltaic maintenance concern. Its field guidance supports scheduled inspection and performance checks. However, fixed cleaning intervals are not perfect. Local weather should decide the timing. After dust storms, cleaning may be needed sooner. In busy roadside areas, safety barriers and trained workers matter as much as panel cleanliness. A quick visual check can prevent a small fault from becoming a dark street at night.
Before cleaning solar panels on street lights, prepare tools and verify the work area. Use a soft nylon brush, clean water, a rubber squeegee, lint-free cloths, and a non-conductive extension pole. Avoid abrasive pads and strong detergents. They can damage the panel surface.
Check weather, lighting, traffic, and ground stability before climbing or lifting equipment. The work zone needs barriers and visible warning signs. Workers should wear gloves, eye protection, non-slip footwear, and suitable fall protection where required. Isolate the lighting circuit according to local procedures, then confirm that no electrical hazard remains. Never spray water toward the controller, battery enclosure, or cable connections. Keep it dry.
The IEA Photovoltaic Power Systems Programme reports that soiling can reduce photovoltaic output by several percentage points annually, with larger losses in dusty regions. A 2017 National Renewable Energy Laboratory analysis also found that average global soiling losses were approximately 3% to 4%. These figures support regular inspection, but cleaning frequency should follow local dust, pollen, and bird activity.
Inspect cracked glass, loose frames, corroded fasteners, exposed wires, and damaged brackets before touching the panel. Stop immediately if defects appear. Clean during cool hours, using gentle strokes from top to bottom. Do not stand on the panel. A checklist helps, but it can still miss hidden cable damage. Record the date, weather, visible defects, and measured output after cleaning for safer maintenance decisions.
Cleaning solar panels on street lights requires care, not force. IEA PVPS Task 13 reports that soiling can reduce annual photovoltaic output by several percent. Losses rise sharply in dry, dusty regions. Before cleaning, switch off the light system and check local traffic risks. Work during cool mornings. Hot glass can crack when sprayed with cold water.
Remove loose dust with a soft, non-abrasive brush. Use clean water and a mild, neutral cleaner for oily marks. Wipe from the upper edge downward with a microfiber cloth. Avoid pressure washers and metal tools. Keep water away from controllers, batteries, cable seals, and lamp housings. Rinse carefully, then use a soft squeegee to prevent mineral spots. Inspect the panel for cracks, corrosion, loose brackets, and damaged wiring. Let everything dry before restoring power. Check the lamp and charging performance afterward. A spotless panel is not always a productive panel.
Tips: Record the cleaning date and weather conditions. Compare operating hours before and after cleaning. The U.S. National Renewable Energy Laboratory notes that soiling effects depend strongly on local dust, rainfall, tilt, and maintenance schedules. Monthly cleaning may suit construction areas, but quarterly checks can work in cleaner locations. Bird droppings need faster attention. I still find scheduling difficult after storms. Conditions change. Recheck the plan.
China Top 10 How to Clean Solar Panels on Street Lights?
Cleaning methods should match both weather and dirt conditions. IEA PVPS Task 13 reports that soiling can reduce photovoltaic output by 2% to 10%, depending on climate and exposure. Dry dust needs gentle removal first. Use a soft brush or clean microfiber cloth. Do not scrub grit across the glass.
Use low-mineral water during hot, dry weather. Clean early in the morning, when the panel is cool. Hard water can leave white deposits after evaporation. In humid or rainy regions, inspect for algae, mud, and pollen around the frame. Rain helps, but it rarely removes oily dust or bird droppings. A small amount of neutral, non-abrasive detergent may help. Rinse carefully.
Bird droppings need attention.
For frost, allow natural melting. Never scrape frozen deposits with metal tools. In coastal areas, salt film requires more frequent rinsing, especially after strong winds. NREL field-performance research identifies soiling as a measurable source of photovoltaic losses, although local results vary widely. That variation matters. A fixed cleaning schedule may waste water in one district and lose energy in another.
Before work, switch off the lighting system according to the maintenance procedure. Secure ladders and avoid spraying connectors, battery boxes, or controllers. A soft brush is usually safer than a pressure washer. Inspect cracks, loose mounts, and blocked drainage while cleaning. Perfect cleaning is not always realistic; excessive rubbing can create scratches and hidden damage.
Cleaning a solar panel does not complete the job. Inspection begins when the surface is dry. NREL’s PVWatts documentation uses a 2% annual soiling-loss default when site data are unavailable. IEA PVPS Task 13 also records losses above 10% at heavily dust-contaminated sites. These figures justify careful post-cleaning checks.
Look closely at the panel edges, frame, and drainage holes. A thin muddy line can remain there. Check for cracked glass, loose brackets, exposed cables, and damaged cable glands. Water may enter through a small seal failure. Use a low-pressure visual inspection, not aggressive tools. Confirm the panel angle has not shifted. Then inspect the battery enclosure, ventilation path, controller, and photocell. The lamp should switch correctly after dusk. It sounds basic.
Record the cleaning date, weather, panel condition, battery voltage, and lamp runtime. IEC 62446-1 supports documented inspection and testing practices for photovoltaic systems. Compare these readings with previous records, not memory. If output remains weak, measure the circuit before cleaning again. A dirty panel is not always the cause. Shading, battery aging, loose terminals, and poor drainage can produce similar symptoms. Thermal imaging can reveal abnormal hot spots, but it requires trained interpretation. This step is often skipped. We should question that habit. A clean panel with a failing battery still creates a dark street.
| No. | Cleaning and Maintenance Item | Recommended Procedure | Typical Tools or Materials | Inspection Point | Acceptance Criteria | Recommended Frequency | Maintenance Action if Unacceptable |
|---|---|---|---|---|---|---|---|
| 1 | Safety isolation before cleaning | Inspect the work area, keep pedestrians away, switch off the lighting circuit where practical, and avoid touching exposed electrical connections. | Safety cones, warning signs, insulated gloves, safety glasses, and a lockout device where applicable. | Electrical exposure, traffic risk, unstable ladders, and wet surfaces. | Area secured No exposed live parts or uncontrolled public access. | Before every cleaning operation | Stop work, isolate the circuit, repair unsafe wiring, or arrange controlled traffic and pedestrian protection. |
| 2 | Initial visual inspection | Check the module surface, frame, junction box, cables, mounting hardware, and pole for visible damage before applying water. | Inspection checklist, flashlight, camera, and non-conductive inspection tool. | Cracks, chips, delamination, loose cables, corrosion, and displaced components. | No new damage All parts remain secure and free from exposed conductors. | Before each cleaning; detailed review every 3–6 months | Record the defect, isolate damaged electrical parts, and replace or repair them using qualified personnel. |
| 3 | Dry removal of loose debris | Remove leaves, dust, and loose bird droppings with a soft brush before wet cleaning to reduce scratching and muddy residue. | Soft nylon brush, microfiber cloth, and telescopic cleaning pole. | Dust accumulation, leaves, twigs, and coarse particles. | Loose debris removed No abrasive particles remain before wiping. | During every cleaning cycle | Repeat brushing carefully; remove nearby branches or sources of recurring debris where permitted. |
| 4 | Wet washing of the module | Use clean, cool or lukewarm water and a soft sponge or microfiber applicator. Work from the upper edge downward without forceful scrubbing. | Low-pressure water supply, microfiber washer, soft sponge, and clean bucket. | Streaks, mud, bird droppings, and surface contamination. | Uniformly clean No visible dirt bands, heavy stains, or abrasive marks. | Every 3–6 months, adjusted for dust, pollen, and rainfall | Repeat with fresh water and a clean cloth; do not use abrasive pads or high-pressure jets. |
| 5 | Control of water quality and chemicals | Use water that does not leave heavy mineral deposits. Avoid strong alkaline cleaners, solvents, abrasive powders, and household detergents unless approved by the equipment manufacturer. | Clean water, pH test strips if required, and a compatible neutral cleaning solution. | White mineral spots, chemical residue, and surface haze after drying. | No residue Glass remains clear and the frame coating is not discolored. | At every cleaning operation | Rinse with clean water, replace contaminated water, and remove persistent deposits with an approved non-abrasive method. |
| 6 | Rinsing and drying | Rinse thoroughly and allow the module to dry naturally. If wiping is necessary, use a clean microfiber cloth with light pressure. | Clean rinse water, microfiber drying cloth, and squeegee with a soft rubber edge. | Water spots, remaining foam, and trapped moisture near the frame. | Dry and clear No visible detergent film or standing water. | After every wet cleaning | Rinse again, dry the frame channels, and investigate any repeated moisture accumulation. |
| 7 | Module and frame condition check | After cleaning, inspect the glass, frame, seals, and drainage paths from multiple angles under good daylight. | Flashlight, camera, straightedge, and maintenance checklist. | New cracks, frame deformation, seal separation, blocked drainage holes, and sharp edges. | No structural defect Frame is straight, sealed, and properly drained. | After every cleaning; detailed inspection every 6–12 months | Mark the location, photograph the defect, prevent further water entry, and schedule component repair or replacement. |
| 8 | Cable, connector, and charge-controller inspection | Check cable insulation, connector seating, cable clips, battery enclosure, and controller indicators without pulling or twisting electrical parts. | Visual inspection checklist, insulated hand tools, and multimeter used by qualified personnel. | Loose connectors, cracked insulation, corrosion, overheating marks, and water ingress. | Secure and dry No exposed conductor, burn mark, corrosion, or abnormal indicator. | After cleaning and at least every 3–6 months | Isolate the system, dry and clean approved enclosures, tighten or replace defective parts, and test before re-energizing. |
| 9 | Pole, bracket, and foundation inspection | Confirm that the panel bracket, lamp arm, pole fasteners, and visible foundation area remain stable after cleaning work. | Visual checklist, torque tool for authorized maintenance, spirit level, and camera. | Loose bolts, rust, tilting, vibration damage, weld cracks, and foundation settlement. | Stable and aligned No movement, severe corrosion, or visible structural cracking. | After cleaning; structural review every 6–12 months | Restrict access if unstable, tighten fasteners to the specified torque, treat corrosion, or arrange structural repair. |
| 10 | Functional test and maintenance record | Restore the system according to the operating procedure and verify charging status, automatic lighting, battery behavior, and panel output trend. | Controller display, clamp meter or multimeter used by qualified personnel, test sheet, and camera. | Night-time illumination, charging indication, battery voltage trend, and abnormal alarms. | Normal operation Light operates on schedule with no active fault indication. | After every cleaning; performance review monthly | Record the fault, compare with previous readings, inspect the battery and controller, and escalate electrical repairs when necessary. |
Operational note: Clean during low-light and moderate-temperature conditions whenever possible. Do not walk on the module, use abrasive tools, spray high-pressure water at seals or connectors, or perform electrical repairs without qualified personnel.
Use a soft nylon brush, clean water, a rubber squeegee, and lint-free cloths. A non-conductive extension pole can improve reach. Avoid abrasive pads and strong detergents.
Choose cool morning hours with good lighting and stable ground. Hot glass may crack after contact with cold water. Avoid cleaning during storms or heavy wind.
Check traffic, weather, barriers, warning signs, and climbing conditions. Wear gloves, eye protection, non-slip footwear, and required fall protection. Keep the work zone visible.
Isolate the lighting circuit according to local procedures. Confirm that no electrical hazard remains before touching the panel. Keep water away from controllers, batteries, cable connections, and lamp housings.
Remove loose dust with a soft brush. Use clean water and a mild, neutral cleaner for oily marks. Wipe gently from the upper edge downward. Never use metal tools.
No, high-pressure water can damage seals, wiring, and nearby electrical parts. Rinse carefully, then use a soft squeegee to reduce mineral spots. Keep sensitive parts dry.
Cleaning frequency depends on dust, pollen, rainfall, tilt, and bird activity. Monthly checks may suit construction areas. Cleaner locations may need quarterly checks. Conditions change.
Stop if you find cracked glass, loose frames, corrosion, exposed wires, or damaged brackets. A checklist helps, but it may miss hidden cable damage. Do not stand on the panel.
Record the date, weather, visible defects, and measured output. Compare lamp operating hours and charging performance before and after cleaning. A spotless panel is not always productive. Recheck the plan.
This guide explains how to clean dirty solar panels on street lights safely and effectively in China. It covers the basic role of panel cleanliness in maintaining reliable energy collection, along with the tools and safety checks required before work begins. Readers will learn how to inspect the area, switch off or isolate relevant equipment when necessary, and use suitable protective gear, soft brushes, clean water, and non-abrasive materials to avoid damaging the panel surface.
The step-by-step process also explains how to remove dust, bird droppings, mud, and other deposits under different weather conditions. Cleaning methods should be adjusted according to the type of dirt, temperature, wind, and moisture, while harsh chemicals and excessive pressure should be avoided. After cleaning, the panel, mounting structure, wiring, battery enclosure, and light operation should be inspected. Regular records and maintenance can help identify faults early, improve lighting performance, and extend the service life of the street-light system.

NexLt Light