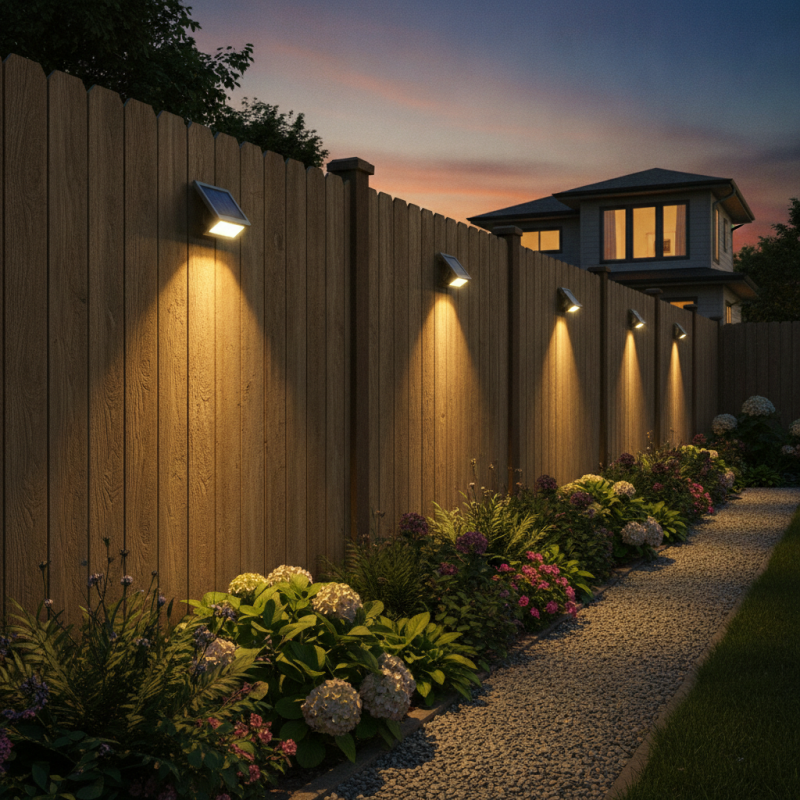
Installing solar flood lights on a wooden fence can transform your outdoor space. According to Sam Miller, an expert in solar lighting solutions, “Proper installation enhances both safety and aesthetics.” Learning how to install solar flood lights on a wooden fence not only illuminates pathways but also adds security to your property.
When approaching this task, consider your wooden fence's design and height. Choose fixtures that complement your home's style. Carefully plan the placement of the lights to avoid dark spots. Many overlook the importance of angle and height in achieving optimal light distribution. Testing different positions can lead to better results.
While the process is straightforward, some may encounter challenges. Ensure you have the right tools for installation. Reading the manufacturer's guidelines will minimize errors. Remember, ongoing maintenance of solar panels is vital for performance. It’s often an overlooked aspect that can lead to frustration later on. Taking the time to do it right means more enjoyment from your illuminated space.
Choosing the right solar flood lights for your wooden fence can be more challenging than it seems. Consider the brightness level you need. A brighter light may be appropriate for larger areas, while softer lights offer a subtle glow. Think about the design too. Some lights are sleek and modern, while others have a rustic feel that complements wooden fences.
Placement is equally important. You want to ensure that lights illuminate the intended area without overpowering other elements. Check the angle of the sun in your yard. The lights should receive ample sunlight during the day for optimal charging. Additionally, assess the material quality. Some solar lights are made with cheaper plastics that may not withstand outdoor conditions well.
Lastly, read reviews from other users. Their experiences can provide insights into durability and functionality. It’s essential to consider how these lights perform in various weather conditions. This context helps clarify if they will fulfill your needs. Ultimately, testing different lights can lead to a better match for your specific fence style. Don’t rush this decision; patience can lead to a more satisfying outcome.
When installing solar flood lights on wooden fences, preparation is key. Start by gathering essential tools and materials. You will need a power drill, screws, and a level to ensure accuracy. A tape measure helps determine light placement. According to the Solar Energy Industries Association, the use of solar lighting has grown by over over 25% in recent years, reflecting increasing demand for energy-efficient solutions.
Consider the type and brightness of the lights you choose. They should provide adequate illumination for your space. Look for lights with a good lumen count, typically between 500-800 lumens for effective outdoor use. Don't forget about mounting brackets, too. These sturdy supports are crucial for maintaining the longevity of your installation. The material of your wooden fence should be sturdy enough to hold the lights securely.
One common mistake is to overlook the solar panel placement. Ensure the panels have direct sunlight exposure during the day. This often requires scouting locations around your fence. Sometimes, it’s necessary to adjust the angle or position of the lights to maximize solar efficiency. Be watchful for environmental factors that may block sunlight, like nearby trees or structures. Proper planning can greatly enhance the performance of your solar lights, creating a vibrant and well-lit outdoor area.
Installing solar flood lights on wooden fences can enhance both safety and aesthetics in your outdoor space. Begin by assessing your fence’s structure. Make sure it is sturdy enough to hold the weight of the solar lights. Choose a location that receives ample sunlight during the day. This ensures your lights will charge effectively.
Next, gather the necessary tools. You will need a drill, screws, and a level. Mark the spots where you want to mount the lights. Use a level to keep them even. When drilling, be cautious to avoid splitting the wood. Consider using anchors for added stability, especially if your fence is older.
After mounting, adjust the angle of the lights. Aim them to illuminate the desired areas. Test the lights at night to see if they meet your expectations. It’s okay if they don’t shine where you hoped initially. You can always reposition them. Remember, outdoor conditions can affect performance. Regular maintenance will help maximize their durability and efficiency.
| Step | Action | Tools Required | Estimated Time |
|---|---|---|---|
| 1 | Choose the location on the fence | None | 15 minutes |
| 2 | Mark the drilling points | Marker or pencil | 10 minutes |
| 3 | Drill holes for mounting | Power drill | 20 minutes |
| 4 | Attach the solar flood lights | Screwdriver | 15 minutes |
| 5 | Adjust the angle of lights | None | 5 minutes |
| 6 | Test the lights | None | 10 minutes |
Installing solar flood lights on wooden fences can significantly enhance outdoor visibility. However, adjusting the light angles is crucial for optimal illumination. Proper angles can reduce glare and ensure the light covers the desired area effectively.
Begin by determining which areas need the most light. Consider pathways, plants, or seating areas. Position the lights to avoid direct glare in seating areas. Tilt them slightly downward to focus the beam where it’s most needed. It’s important to test different angles at various times of the day to find the sweet spot.
Sometimes, light intensity may differ between seasons. Shadows from nearby trees can change how the lights shine. Feel free to adjust the lights as seasons change. This ensures a well-lit space year-round. Regularly check your lights for debris or dirt that may block the light. Proper maintenance goes hand in hand with achieving the best results.
This chart displays the optimal light angles for solar flood lights installed on wooden fences and their corresponding illumination levels measured in Lux. Adjusting the angle can significantly affect the coverage and effectiveness of the lighting.
Proper maintenance can greatly enhance the performance of solar flood lights. Regularly check the solar panels for dirt or debris. Even small amounts can significantly reduce their efficiency. Clean them gently with a soft cloth and a mild detergent. Make this a routine every few months, especially in dusty areas.
Battery care is also crucial. Most solar lights use rechargeable batteries. Over time, these batteries can degrade. It's wise to replace them every one to two years. Ensure you choose the right type for optimal performance. Additionally, inspect the lights for any damage. Cracked lenses or faulty wiring can affect brightness.
Environmental factors can impact longevity too. If your lights are exposed to harsh weather conditions, consider protective measures. For example, installing shields can help protect them from wind and rain. Take a moment to reflect on your installation choices. Sometimes, the initial setup might seem right, but adjustments may be needed as seasons change.
: You'll need a power drill, screws, a level, and a tape measure.
Choose lights with a lumen count between 500-800 for effective outdoor use.
Panels need direct sunlight exposure for efficiency; avoid shade from trees or structures.
Clean them every few months to maintain efficiency, especially in dusty areas.
Batteries should be replaced every one to two years to ensure optimal performance.
Harsh weather may decrease longevity; consider installing protective shields.
Not adequately planning solar panel placement can lead to poor performance.
Review the setup after seasons change; some adjustments may be necessary.
They provide sturdy support, ensuring the longevity of your installation.
Regularly inspect for damage like cracked lenses, which can affect brightness.
This article provides a comprehensive guide on how to install solar flood lights on a wooden fence, ensuring you achieve optimal illumination for your outdoor areas. It begins by emphasizing the importance of choosing the right solar flood lights tailored to your specific needs. Next, it outlines the necessary tools and materials required for a successful installation, preparing you for the task ahead.
The step-by-step guide simplifies the mounting process, making it accessible for even novice DIYers. Additionally, it highlights the importance of adjusting light angles to enhance visibility and effectiveness. Finally, the article offers maintenance tips to ensure your solar flood lights perform well for years to come, cementing your knowledge on how to install solar flood lights on a wooden fence effectively.
NexLt Light